Wednesday, September 28, 2011

Paleo Spaghetti Squash and Meatballs

Spaghetti Squash and Meatballs

For the meatballs, I mixed ground pork and ground beef with Italian sausage seasoning, Italian herbs, and garlic powder, along with salt and pepper.
 I browned the meatballs in batches in coconut oil.  I'm using my electric skillet, the same one I used when we were staying in a hotel for a month.  (We were searching for a house at the time, and we were getting sick from eating fast food - our hotel room didn't even have a microwave.  That's when we decided to do the Whole 30.  We bought an electric skillet and I cooked our meals every day in a niche between the bedroom and the bathroom.  And yes, I washed dishes in the bathtub!)
After all the meatballs were browned, I added onions and sauteed them.  Then I added this:
Look at the ingredients!
Before I added the tomato puree, I turned the temperature way down because tomato products spatter like crazy.  If your pan isn't hot, they won't explode everywhere.
I added some garlic and salt to the tomato puree and then I added the meatballs.  I let the mixture simmer, covered, until done.
Now on to the spaghetti squash.
I cut the squash in half and removed the seeds.
I put the one half of the squash in a microwave safe dish (Pyrex!) with a little water and microwaved the squash for about 8 minutes.  Then I cooked the other half of the squash the same way.
My assistant used a fork to make the spaghetti.  She loves this part.
I seasoned the squash with salt and pepper.
Enjoy!

Tuesday, September 27, 2011

Before and After: Day 3


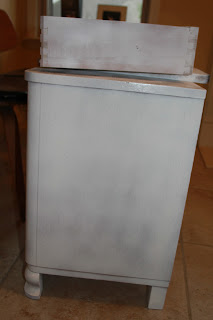
I used spray paint for the first coat, but it looked like this:
 
After one coat, I could tell that spray paint wasn't going to work on this nightstand.  It did a great job on the wood used for the drawer, but the wood on the nightstand is different.
See how nice and shiny the edge of the drawer is. 
After a few rain delays, I went to Home Depot and bought a can of paint and paint rollers.  Hopefully I'll be able to get a nice finished nightstand using the right materials.  


Monday, September 26, 2011

A Post About Cleaning Kitchen Cabinets That Will Blow Your Mind!

So, I was browsing Apartment Therapy the other day and ended up skimming the comments on a post about cool lampshades or adding a shot of color in unexpected places or somebody's chic post modern bungalow in Toluca Lake when I came upon something that pretty much rocked my world.  Though the idea was beyond simple, it was right up my alley, and something I put into practice that same evening.  Read below for the scoop.  And you're welcome.

KITCHEN TIP: Once you've put the last dish in the dishwasher and wiped the last Cocoa Pebble from your counter, take just a minute more and clean one of your cabinet fronts.  A once daunting task, such as cleaning your kitchen cabinets, is now - PRESTO! - manageable.  

While they may never be all clean at the same time, at least I know that every 25 days each cabinet in my kitchen is getting a little rub down from yours truly.  Call me crazy, but that makes me feel just a little more sane and a lot less gross [since, before tackling this new tactic, I couldn't remember the last time my cabinets had seen the business end of a dish rag]. 

Plus Quilt

I blogged about this quilt a while ago - it's the Plus Quilt, and a tutorial is available from In Color Order.  I finished this quilt before we packed up our things and moved to Alabama, but I forgot to take a picture of it.
The quilt was easy to make, and H loves it.
The backing is a solid from Connecting Threads.  I'm starting to love solids.  I straight line quilted .25 inches from the seams of each block.  You can see I got lazy and only stitched one line vertically!

Friday, September 16, 2011

Baked Kale Chips


I'm no stranger to kale.  I love it!  I first discovered it when I wanted to make Creamy Parmesan Swiss Chard Gratin for Thanksgiving a few years ago.  There was no Swiss chard to be found in Lake Charles, so I substituted kale and it was a hit.  I still make it every Thanksgiving.  


For the baked kale, I pulled the leaves off the stems, washed the leaves and dried them.  I preheated the oven to 375 degrees and spread the dried kale leaves on a parchment lined baking sheet.  After a drizzle of olive oil and a sprinkling of salt and pepper, I put them in the oven.  Here's where I made a mistake.  I started vacuuming the bedroom and forgot about the kale in the oven.  Here's the result:


I'm going to try this recipe again, but this time I'll hang around the kitchen for the 10-15 minutes it takes for the kale to get crispy. 


Thursday, September 15, 2011

Before and After: Day 2 - Priming the Nightstand

This morning I assembled everything needed for priming the nightstand.  There's primer, a sanding block, a damp cloth, disposable gloves, and newspaper.  I spread the newspaper on the ground and sanded the parts of the nightstand that I filled with wood filler yesterday.  Next I used the damp cloth to wipe the nightstand.  Then I sprayed with primer, following the directions on the can.  
nightstand with 1 coat of primer
 I'm off to spray the nightstand with 1 more coat of primer.  Tomorrow is painting day, and it's supposed to rain.  Hopefully I'll get the piece painted before the rain comes.  I can't wait to see the finished product. 

Wednesday, September 14, 2011

Before and After: Day 1 - Sanding and Filling Holes

This nightstand has been following us every time we move.  I know it's not mine, and Mr. Moore, Please doesn't remember where it came from.  We both agree that it needs a little work.
At our New York apartment, H was using this as a sewing table.  Before I let her bring it upstairs at our new house, I wanted to give it a makeover.  
 I gathered sanding blocks, wood filler, a putty knife, spray primer (not pictured), spray paint, and new knobs.  I also used a screwdriver to remove the hinge.
 Always put your hardware and screws in a bowl - a tip from my dad.  Next, I sanded the piece.  It took both sandpaper blocks to remove the finish from the nightstand.
 Then I filled the holes using wood filler and a putty knife.  I will let the putty dry before continuing tomorrow.  See you then.